PyCharm is software for programming in Python.
Advantage: PyCharm is very powerful, and it has features that can save you a lot of time on complicated projects.
Disadvantage: PyCharm takes extra time to install, configure, and learn at first. (To start programming more quickly, you can use the repl.it website)
PyCharm is an Integrated Development Environment (IDE).
Installing Python and PyCharm
1) Install the Python language from python.org. PyCharm doesn’t come with Python, so you need to install both Python (language) and PyCharm (IDE).
Download the latest version of Python (3.7 as of Oct 2018).
Bonus: when you install Python, you can check the option that says “add to path” to make it easier to run Python programs from the command line, which is a cool thing to be able to do.
2) Download and install PyCharm Community Edition. (Because it’s free. Professional Edition costs money. There’s also a PyCharm Edu version that comes with tutorials, and you can feel free to use that instead. They are similar, but these instructions are for PyCharm Community Edition.)
Starting in PyCharm
Before you create your first project, click configure and then settings.
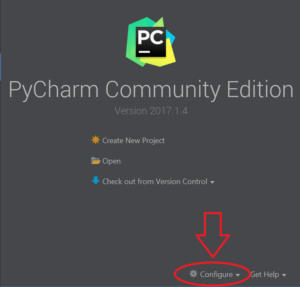
If you already created a project, go to File menu and click Close Project to return to the screen shown above.
The next step will allow PyCharm to find your Python installation. Without this step, PyCharm can’t run your programs!
In Settings, click to Project Interpreter and then click the gear icon. Then click “Add Local.”
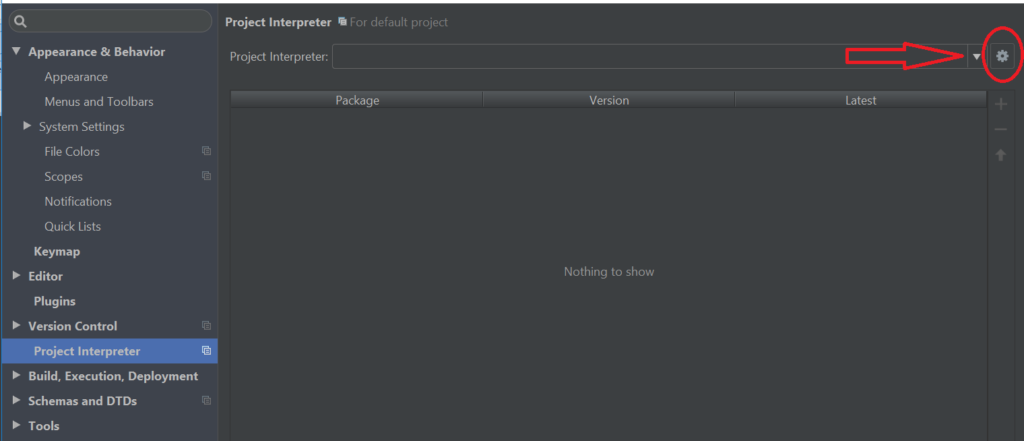

From here, you need to browse to the folder where “Python.exe” is installed from python.org.
A typical installation can be found in a folder similar to this one:
C:\Program Files (x86)\Python37-32\python.exe
You will need to browse to the Program Files (x86) folder to find the Python folder and then select python.exe.
Create a Project
A project is a collection of files. You can have multiple python files. You can also include other types of files in your project such as text files and image files.
From the opening menu, click “Create New Project.”
Give your project a name.
(Don’t call it untitled1 – that’s not cool)
Pay attention to the project’s Location. This is where the files will be saved on the computer. Choose any location you like.
Select the Interpreter that you configured in the previous step.
Click “Create” on the bottom right.
Create a Python File
Now you have to create a code file.
Here are two quick ways to do that:
Option 1) Click the File menu, click New, then click Python File.
Option 2) Right Click the project folder, click New, click Python File.
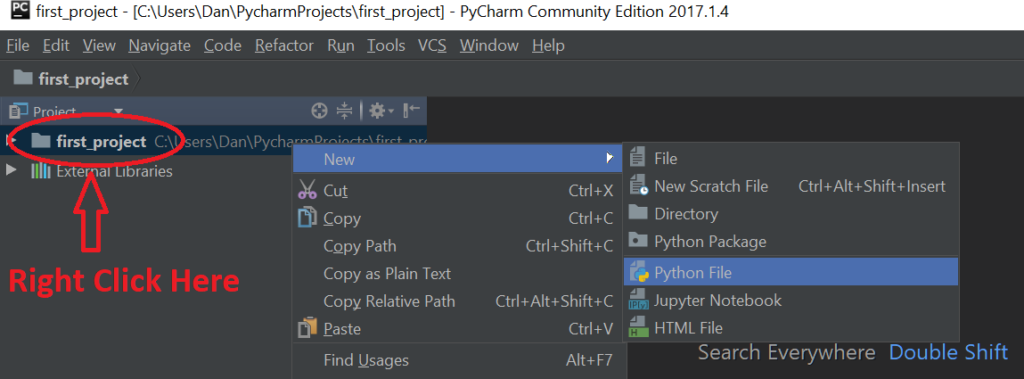
Either way, you should get a code editor window.
Create an exciting program, maybe something like this:
print('Hello World')
x = 7
Find the “Run” button, or go to the Run menu and click Run. The first time you do this, you have to click on a “Run Configuration.” Click until it works, and hopefully it will print “Hello World” in the bottom part of your screen.
Python Console / Interactive Python
After that first run, you will not yet be able to interact with variables and functions stored in memory. Let’s fix that.
Click the Run menu and click Edit Configurations.
Check the “Show command line afterwards” option:
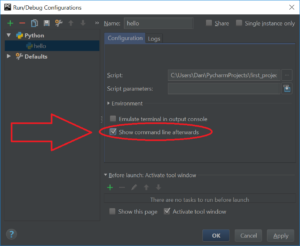
Now run the program again. You should now have a place to type Python commands. Type “x” and hit enter, and it should tell you the value of that variable:
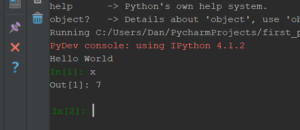
If that worked, you are ready to go!
Update, June 2019
The option described is now “Run with Python console” in newer versions of PyCharm. Also, you can change your Python template in the Run->Edit Configurations menu so that you won’t have to change this option every single time you make a new python file.
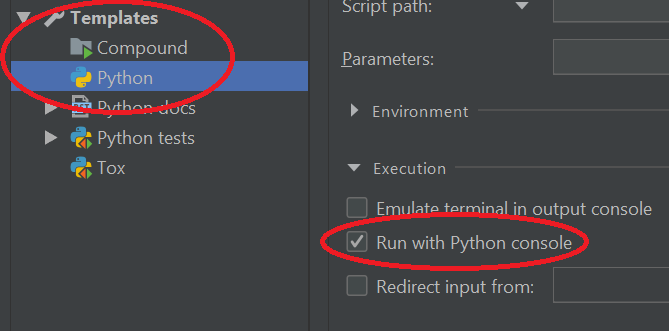
The next time you create a project, it will be much easier: just create a Python file and right click it to find the “Run” action.
Installing Packages (Import Modules)
You can use the terminal tab to install packages. You an also do it from the Interpreter section of settings.
On our school’s network, you have to go to the terminal and paste in something like this to install a package:
pip install Pillow --trusted-host pypi.org --trusted-host files.pythonhosted.org --trusted-host pypi.python.org
This will get around the SSL certificate problems that the school district’s web filter causes. Replace “Pillow” (which is Python Image Library / PIL) with whatever package you need to install.
One more tip:
If you right click a Python file on the left side of your screen, you can click “Show in Explorer“ to quickly locate the file on your computer.