You can use a “Mask” image to paste an image onto a background with some opacity/transparency effects in any shape you want.
Paste with Transparent Background
Alpha Channel – Image Opacity – Masks
If an “RGBA” image already has the alpha values you want, great! Often, however, you need to prepare your own mask to get the effect you want.
Example 1: Mask for blending two images from left to right
I used AI prompts to create two images of the same city: a nice version and an apocalyptic version. We will blend them together in a single image.
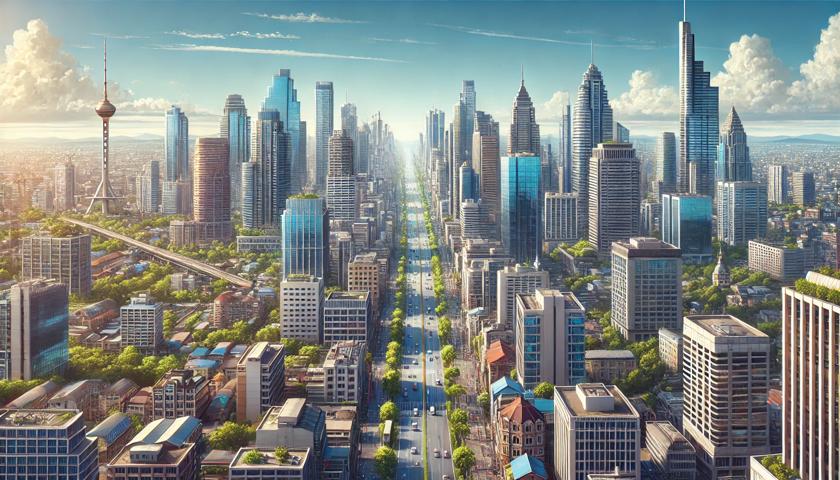
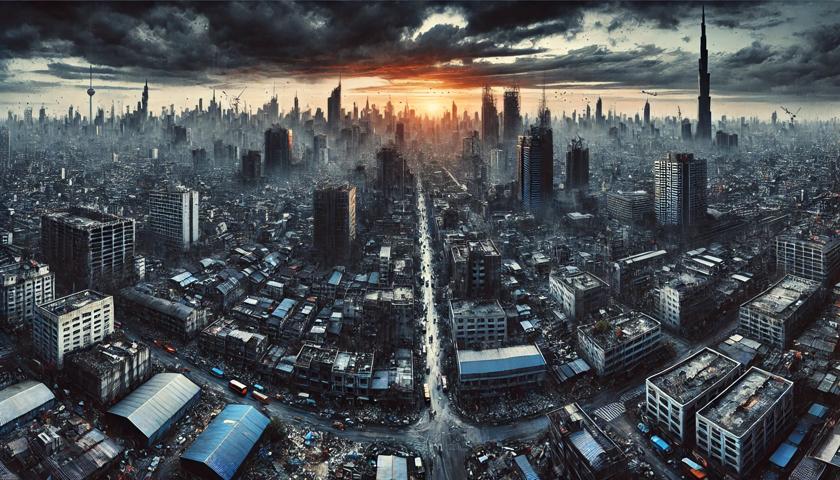
To blend these together horizontally, one easy thing to do is search for a horizontal gradient from the web. We will try two different gradient to see how the results compare.
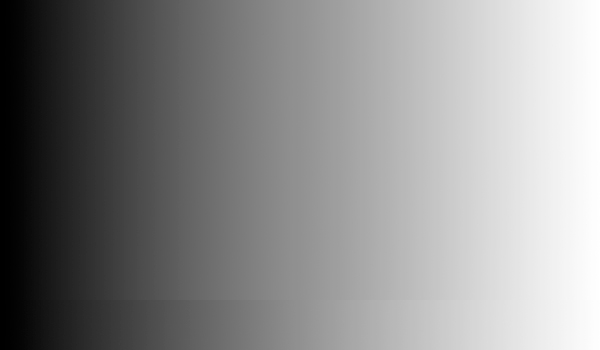
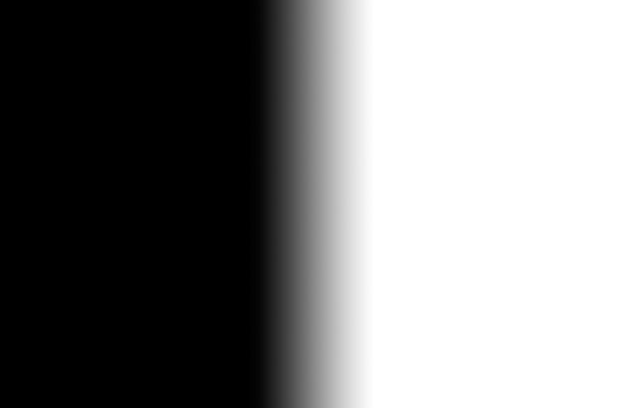
Here’s some code to blend the images:
from PIL import Image
# City images are already the same size
# Otherwise you would resize them to match
nice = Image.open('city_nice.png')
apoc = Image.open('city_apocalyptic.png')

# gradients resized to match city images
# gradients converted to 'L' mode to use as masks
narrow = Image.open('gradient_narrow.png')
narrow = narrow.resize(nice.size)
narrow = narrow.convert('L')
wide = Image.open('gradient_wide.jpg')
wide = wide.resize(nice.size)
wide = wide.convert('L')

# create copy of nice city to avoid altering original
wide_combo = nice.copy()
# pasting apoc onto wide_combo using wide as a mask
wide_combo.paste(apoc, (0,0), wide)
wide_combo.save('output_wide.png')

# create another fresh copy for a different output
narrow_combo = nice.copy()
# pasting apoc onto narrow_combo with narrow as mask
narrow_combo.paste(apoc, (0,0), narrow)
narrow_combo.save('output_narrow.png')

# original images are .png, but I uploaded jpg for web
Summary of the code:
- Load city images and gradient images
- Resize images so they’re all the same size
- Convert gradients to “L” mode, because “RGB” cannot be used as a mask
- Paste one city onto the other city, adding the gradient as a third parameter so the gradient is used as a mask
Let’s really focus in on the key line of code:
wide_combo.paste(apoc, (0,0), wide)
We are using wide_combo as our background image. It’s a copy of the nice city image. The paste command will be modifying the wide_combo image, so at the end we will save wide_combo as a file to create the output.
The image being pasted is apoc, which is the apocalyptic city. We are pasting it at xy coordinates (0, 0). The top left corner of the pasted image will be pasted at this location, which is the upper left corner of the background image. We chose (0, 0) to make the two city images line up with each other.
The third argument of the paste() function is the alpha mask, wide, which is the horizontal gradient file. If you leave this out, your output would simply be an exact copy of the apocalyptic city. The apocalypse version would be completely opaque, and it would completely cover up the nice city in the background.
The alpha mask must be the same size as the image you’re pasting (apoc and wide must match). Also, the mode of the alpha mask must be either “RGBA” or “L” or you will get a “bad transparency mask” error. Use the resize() and convert() functions to satisfy those requirements.
Here’s the output!
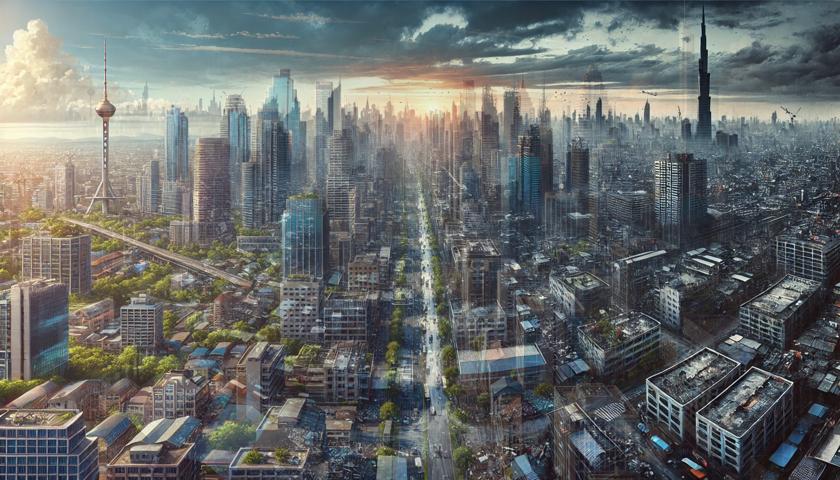
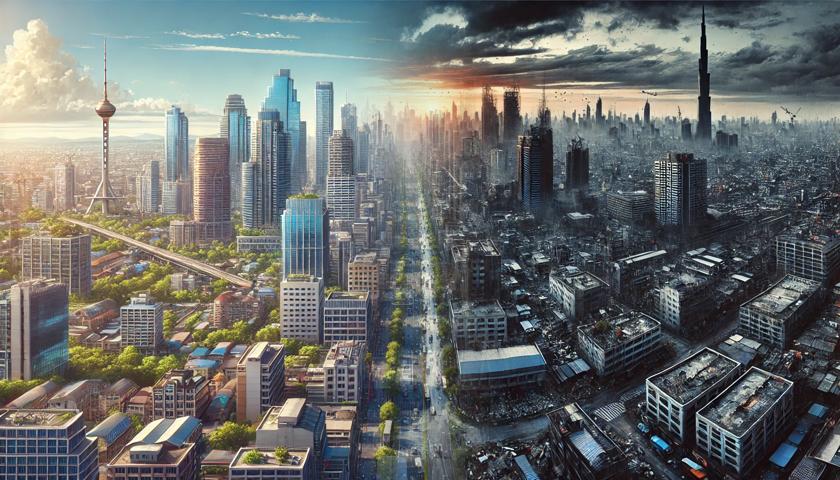
You should compare these two images with the black and white gradient images used to produce the outputs.
Black areas of the gradient file (“L” = 0) give the pasted apocalyptic city image zero opacity, so you don’t see the apolyptic version at all, and you only see the nice city in the background.
White areas of the gradient file (“L” = 255) give the pasted apocalyptic city 100% opacity, so the apocalyptic version completely covers the nice city in the background.
Middle areas with gray colors cause the apocalyptic city to be partially pasted on top of the nice city, but you can still see the nice city underneath the pasted colors. The lighter the mask, the more the apocalyptic city covers up the background, and the less you can see if the background city colors.
Custom Gradients
You can easily create your own horizontal or vertical gradient file by using for loops to set the values of each pixel in a new image.
Example: let’s say you want the left third of the image to be black, the right third to be white, and the middle third to blend from black to white.
The output would look something like this:

from PIL import Image

# create an all black image with mode 'L'
gradient = Image.new('L', (768, 100), 0)
# paste a white rectangle on the right third
gradient.paste(256, (512, 0, 768, 100))
gradient.save('inprogress.png')

# iterate through each pixel in middle third
pix = gradient.load()
for y in range(gradient.height):
    for x in range(256, 512):
        pix[x,y] = x - 256

gradient.save('gradient.png')
I chose to make the middle third of the image 256 pixels wide to make the loop easier to write. That means the overall image is three times as wide as that, or 768 pixels. The height of 100 pixels doesn’t matter, because the finished gradient will be resized to fit any image you want.
The for loop needs to set the first pixel in the middle third (x = 256) to a value of 0 to match the left black side, and it needs to gradually increase to 255 for the last pixel of the middle third (x = 511) to match the white right third.
This key line of code achieves that goal using some simple math.
The lightness is increasing as you move to the right in the image, but the zero value happens is at x = 256 instead of at x = 0.
pix[x,y] = x - 256